When performing a vulnerability scan (or even a penetration test), you must be able to spot a host that is already compromised, contains malware, or is part of a botnet. When malware exists on a host you're testing, the right course of action is to switch from scanning or penetration testing mode into forensics mode to determine how the system was compromised and implement a plan to remove the backdoors that may exist. Unfortunately the best way to be certain all malware has been removed is to format the hard drive and re-install the operating system and all software (provided malware has not hidden inside the BIOS, UEFI, or other hardware sub-system).
Tenable has released several plugins to identify hosts in your environment that show signs of a compromise such as containing malware or participating in a botnet. The steps below outline which plugins to enable and how to create filters to easily find the relevant plugins. You can also download a sample policy that has been pre-configured to include all of the steps below.
Please note that some of the enabled plugins will require credentials for your Windows targets, and you can provide them in the credentials tab inside the policy.
Fortunately, Nessus contains several plugins to identify the problems described above. Creating the policy is pretty simple:
Step 1: Enable the “Backdoors” Plugins Family
The "Backdoors" family contains plugins that can search for a variety of malware and viruses installed on your systems. It includes older malware, such as the "Bagle Worm," and newer malware such as Stuxnet (as a general rule, Nessus plugins are written for the more popular malware and backdoors).

Also included with the Backdoors plugins is a hosts file check for Windows targets. The Windows hosts file entries are compared against a list of entries known to be included as a result of malware.
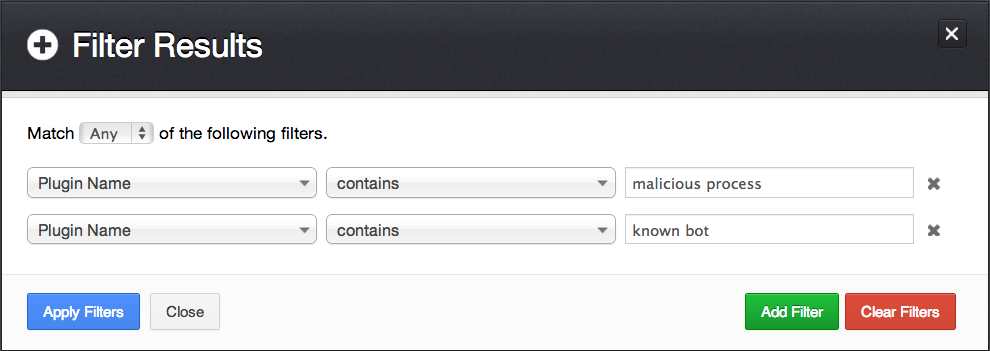
Step 2: Create a Filter to Find All Botnet-related Plugins
Further filters can be created to detect malware, including the following two plugin sets:

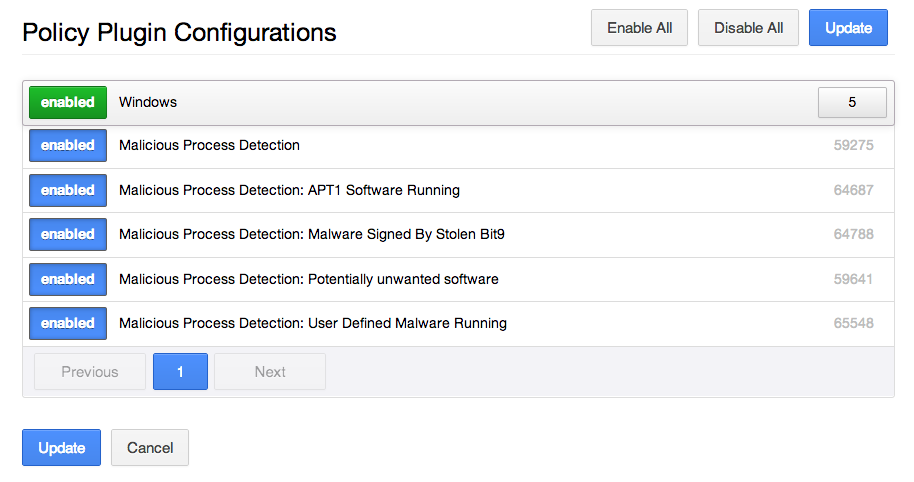
Step 3: Enable Malicious Process Detection Plugins
Once the filter in Step 2 has been applied, you can enable the relevant plugins, including:

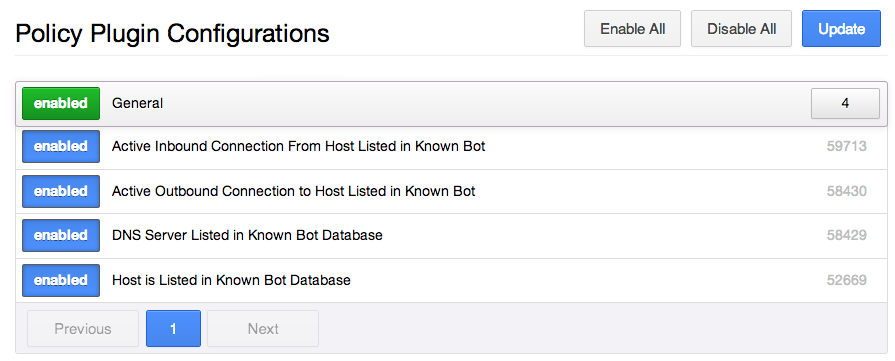
If credentials are supplied, Nessus will report on the active connections, both incoming and outgoing for each target, that are associated with botnet hosts. If the DNS server or any target given to Nessus is listed in a known botnet database, the associated plugins will report that condition.
You can also use malicious process detection to define a list of processes to look for on your own systems with the "Malicious Process Detection: User Defined Malware Running" plugin. For example, if a process was found running on a system that was compromised, and not yet detected by antivirus software, you can enter the checksum for it and have Nessus report on hosts running that particular process.
Step 4: Enable Botnet Detection Plugins
The last set of plugins to enable for this scan is for botnet host detection:

For more information on how Nessus is able to report hosts participating in a botnet, see the post titled "Plugin Updates: Malicious Process & Botnet Detection".
Step 5: Review the Results
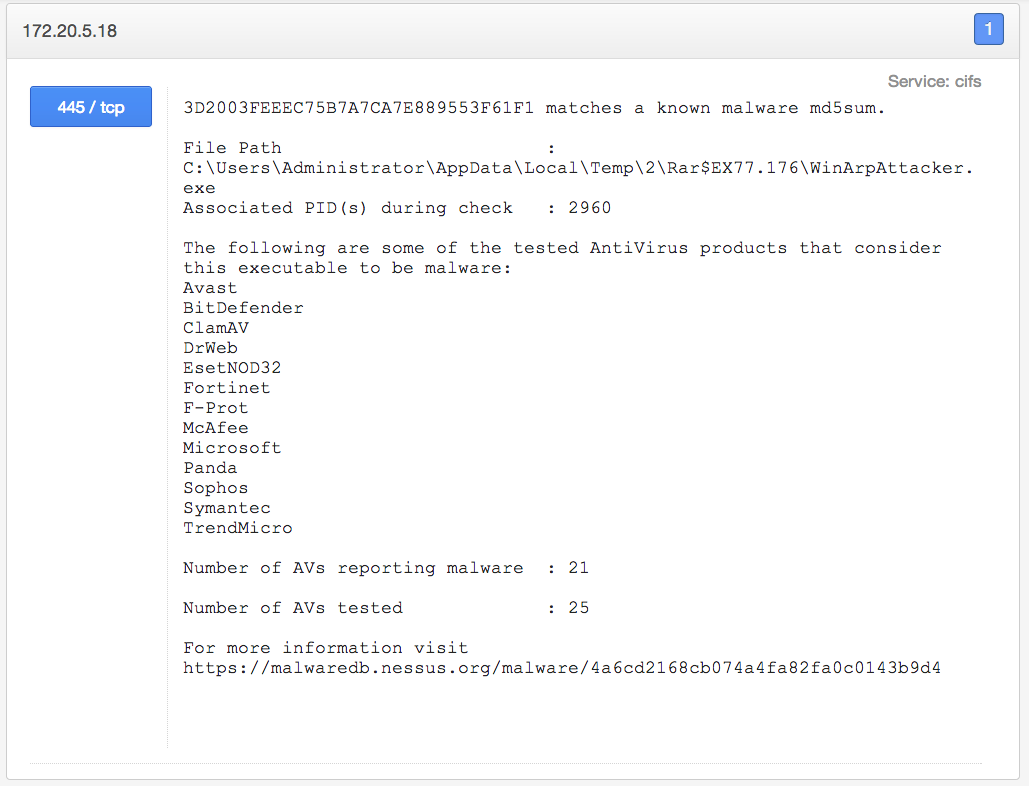
The results from the plugins mentioned above will vary, depending on your environment. Hopefully, they don’t uncover malware in your environment! Below is an example of the malicious process detection plugin, which has triggered against the host 172.20.5.18:

Conclusion
Nessus is capable of running several types of scans, and each has a specific purpose or focus. I like to recommend smaller, focused scans to obtain immediate and actionable results. I also recommend using larger more encompassing scans with all the plugins enabled to use for correlation, data mining, and assessing risk based on ever-changing factors.
More focused scans mean more focused results, which you can share with the appropriate people in your organization and create a response program around the scan. For example, your responses are different when finding a machine that contains malware and finding a machine with a missing patch. Not only are there likely two separate groups that deal with malware and patching, but, in most cases, the priority of removing malware is higher than applying a patch.
Using Tenable SecurityCenter, you can share the scanning load across multiple scanners and create several scan templates and policies for different systems and for different goals. SecurityCenter extends the power of Nessus and also allows you to create user accounts for people in your organization so they can initiate their own scans and track remediation.


0 comentários:
Postar um comentário